This is the 5th email of the Training Series which will help you understand how to Create and Edit a Contact Category to start grouping your contacts into for easy reference.
This email will take you 3 minutes and 30 seconds to read and take action on.
You have previously and successfully learned how to Edit your Email Series. Now you are ready for the next step, which is Creating Contact Categories to specify who and when your contacts will receive your information.
Here are the exact steps to make this happen on your Computer, a Mobile Browser, and through the Mobile App. At the bottom of each section, we will also educate you on how to ADD a Contact to a specific category.
The following instructions are assuming that you have already logged into the system using your login details.
Via Computer Web Browser
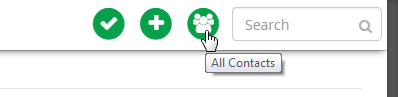
Step 1: On the Action List page, click on the All Contacts icon (top right), to take you to the All Contacts page.
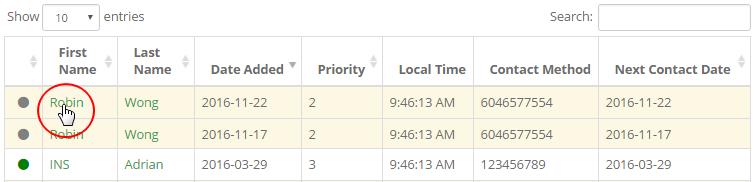
Step 2: Click on the contact you are searching for to open the Contact Manager page for that user.
Note: Both the First Name and Last Name link will redirect to the same page, ie. the Contact Manager page.
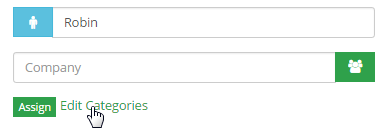
Step 3: In the Contact Info tab, click on the Edit Categories link to take you to the Contact Categories page.
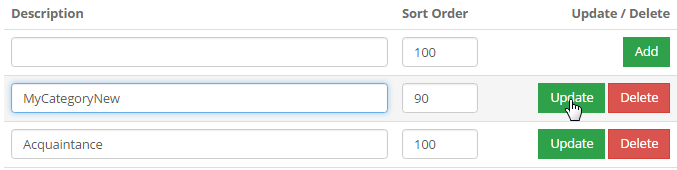
Step 4: The First row should be empty for you to fill in the details of the Category you want to add. Once you have entered the value for the fields, click on the Add button to save the changes. Here’s what you need to do;
- Description: Type in a name or short description of the category you want to add in to the system.
- Sort Order: The order of appearance of the category you want add as displayed in the category list.

Note: For convenience and recommended by us, use sort orders that go up by 10, as this makes it easier to insert a category later without needing to re-number them all. In this case, you can use sort order of 90 or 110.
Step 5: To modify the values of the category, simply edit the same and then click on Update to save the changes.
Note: You can also add/edit a category in the Add a New Contact page. Click on the More Detail link to expand the Optional Information section and then click on the Category link to go to the Contact Category page.

Via Mobile Web Browser
Step 1: On the Action List page, click on the All Contacts icon (top right), to take you to the All Contacts page.
Step 2: Click on the contact you are searching for to open the Contact Manager page for that user.
Step 3: In the Contact Info tab, click on the Edit Categories link to take you to the Contact Categories page.
Step 4: The first row should be empty for you to fill in the details of the category. Once done, click on the Add button to save the changes. In the Mobile Web Browser, you may need to scroll over to the right to accomplish this task.
Step 5: To modify the values of the category, simply edit the same and then click on Update to save the changes.
Note: You can also add/edit a category in the Add a New Contact page. Click on the More Detail link to expand the Optional Information section and then click on the Category link to go to the Contact Category page.
Via Mobile App
The Mobile App eventually redirects you to the mobile browser view as mentioned above. Please follow all the steps below to accomplish this task.
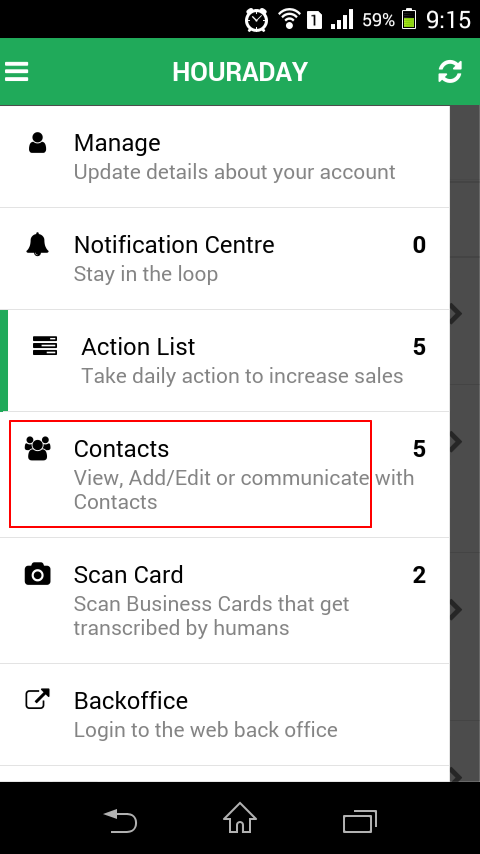
Step 1: On the home page, click on the menu icon at the top left corner to expand the list.
Step 2: From the menu list, click on Contacts to see the full contact list.
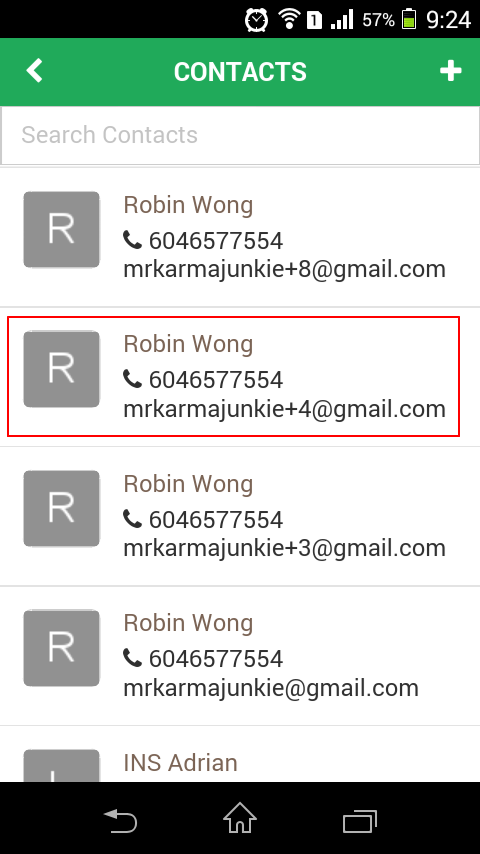
Step 3: From the contact list, click on the contact you want to add/edit email content.
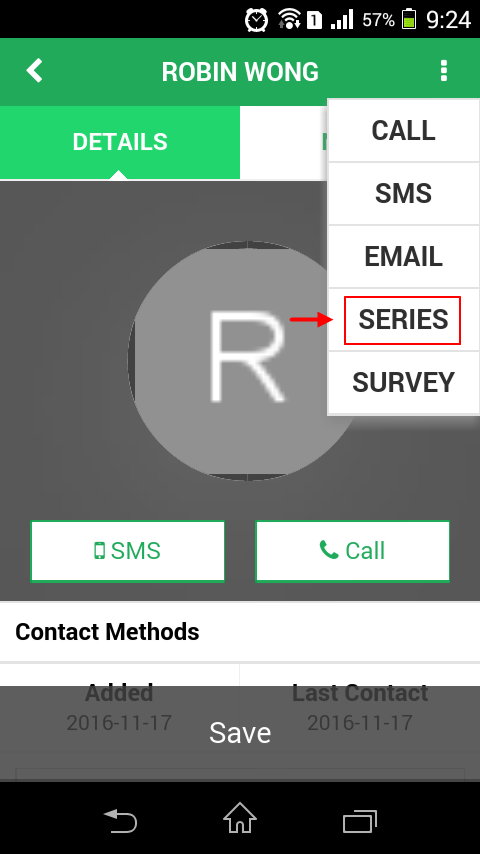
Step 4: On that contact page, click on the icon (3 vertical dots) at the top right corner; in the small dropdown box area, click Series.
Step 5: Scroll down and Click on the Create/Edit Series button at the bottom. This will bring you to the Mobile Browser view as stated above.
Note: Faster way is to click on Backoffice from main menu to go to web version. Make a note that categories can’t be edited directly in the app, so yo use the button to go into the members area like you would on your mobile browser to do it.
Step 6: On the Action List page, click on the All Contacts icon (top right), to take you to the All Contacts page.
Step 7: Click on the contact you are searching for to open the Contact Manager page for that user.
Step 8: In the Contact Info tab, click on the Edit Categories link to take you to the Contact Categories page.
Step 9: The first row should be empty for you to fill in the details of the category. Once done, click on the Add button to save the changes. In the Mobile Web Browser, you may need to scroll over to the right to accomplish this task.
Step 10: To modify the values of the category, simply edit the same and then click on Update to save the changes.
Note: You can also add/edit a category in the Add a New Contact page. Click on the More Detail link to expand the Optional Information section and then click on the Category link to go to the Contact Category page.
Add a Contact to a Category:
For an existing contact:
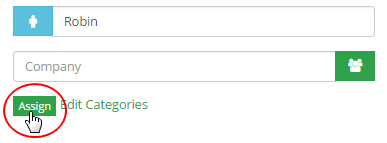
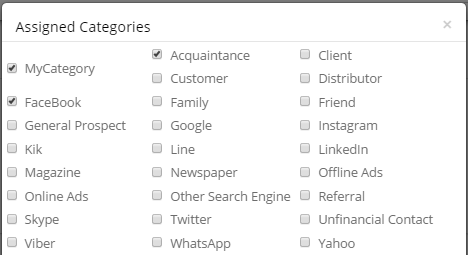
Step 1: To add a contact to a category, go to the Contact Manger interface for that user and then click on the Assign link (above Contact Methods) to open the list of all the available categories in the system.
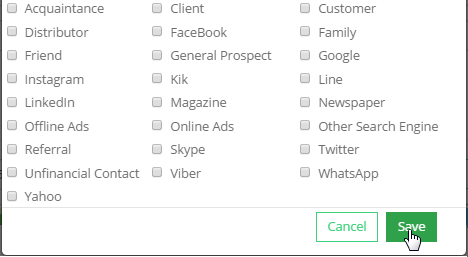
Step 2: In the pop-up window, you can select the categories you prefer to assign to the contact, simply by checking the boxes preceding to the category name and then click on the Save button below to save the changes.
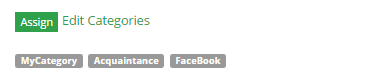
You will notice that the category or categories you have select for this contacts appear below in the open area.
For new contact:
Step 1: While adding a contact in your system, click on the More Detail link (bottom) next to Quick Add button.
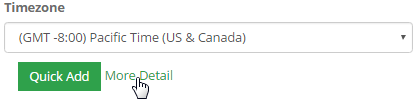
Step 2: In the Optional Information area the first item is to assign a category. Select your option from the drop-down menu. There is also a quick link to go to Contact Category page, in case you need to create a new one.

Purpose of a Category:
Categories are used to group users as you see fit. For example, you can send a custom email to a category or categories, by using the Email Blaster. Check the appropriate box for Categories before sending out the email.
Note: To go to the Email Blaster page, click on Campaigns on the left hand menu and then click on Email Group.
Until our Next Lesson!
Yours Truly,
HourADay.com Support and Training Crew
Skype: ins-support
PS: If you want to jump ahead and learn more, you can see the entire training series by clicking here: Tutorial