In the previous email, we shared an Overview of the main setup areas of your site, which is configuring your Sales Funnel with an emphasis on the basic or the common attributes/areas of the five pages of the funnel.
As a recap, in the Edit Page section of the sales funnel interface, you will notice the following choices:
- Introduction: It is the “Welcome” page which gives a formal introduction about yourself and your business.
- Presentation: Includes your company’s procedures and objectives along with a related video demonstration.
- Enter Details: Includes the surveys (configured in the survey setup) to collect details from your prospects,
- After Survey: It is the “Thank You” page which may contain your contact information or links to other pages.
- After Opt-in:This page will be shown to the prospect as a result of acknowledging your initial email. Once they click on the Approve Sending Me More Information link in that email, they will be redirected to this page.
In this email, we are going to go deeper into the key functionalities of the Presentation page. Ok let’s get started.
This email will take you 6 minutes and 10 seconds to read and take action on.
Here’s a tutorial video which may be helpful in understanding the concepts:
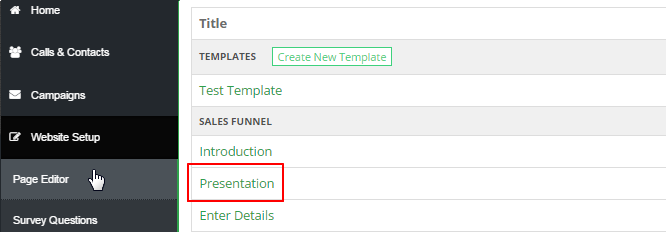
In order to go to the configuration section of your Sales Funnel, click on Website Setup > Page Editor. In the Page Editor, click on the Presentation link under the SALES FUNNEL section. If you are already inside the sales funnel area, select the Presentation option from the drop-down menu in the Edit Page section at the top right.
In this email as mentioned above, we will focus on the Presentation edit area. Here’s an overview explanation (listed below) of some of those key areas that are critical in the design of your presentation page before we dive right in to what it looks like on Computer, a Mobile Browser, and through the Mobile App.
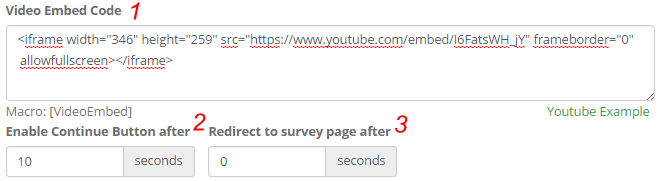
- Video Embed Code: This option lets the system integrate the video embed code into the source code of the page. You can enter your video embed code from YouTube into the box here and it will work perfectly.
- Enable Continue Button after: This option prevents the prospects from moving on to the next page by hiding the continue button until a specified time before the end of the video, forcing them to watch it entirely if that is your choice.
- Redirect to Survey Page after: This option lets the system automatically take the prospect to a Survey page after a specified period of time, if they get distracted, or do not find the Next or Continue button.
Here are the exact steps to see all of the above on your Computer, a Mobile Browser, and via the Mobile App.
The following instructions are assuming that you have already logged into the system using your login details.
Via Computer
Assuming that you are already inside the Presentation page edit interface, following the above instructions.
Step 1: Enter the basic details (as explained in the previous tutorial), i.e. Title, Meta and Meta Keywords.

Step 2: Copy and paste the Video Embed Code in the space provided. Refer to the YouTube Example for help.

Step 3: Set the time out (in seconds) for enabling the Continue button in the Enable Continue Button after field.

Step 4: Set the time out (in seconds) for auto-redirection to the survey page in the Redirect to survey page after field. This is an optional feature that you might like to use to make the process automatic. The Default value is 0 (zero).

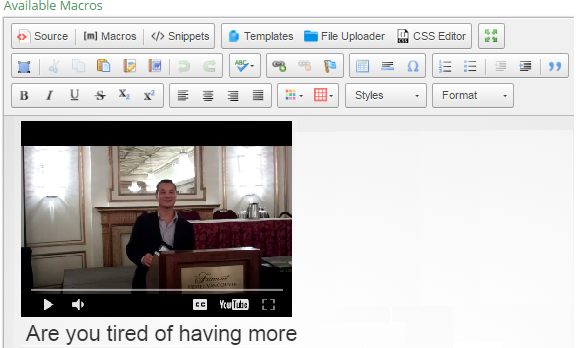
Step 5: Design the page using the editor. Use the macros and tools to enhance the quality of your design.
Step 6: Monitor your progress by clicking on Preview (top right corner) to confirm your action before saving.
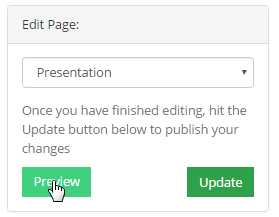
Step 7: Click on the Update button (next to the Preview button) in the Edit Page section to save/apply the changes.

Via Mobile Browser
Step 1: Expand the menu at the top right corner and then click on Website Setup > Page Editor.
Step 2: In the Page Editor, click on the Presentation link under the SALES FUNNEL section.
Step 3: Enter the basic details (as explained in the previous tutorial), i.e. Title, Meta and Meta Keywords.
Step 4: Copy and paste the Video Embed Code in the space provided. Refer to the YouTube Example for help.
Step 5: Set the time out (in seconds) for enabling the Continue button in the Enable Continue Button after field.
Step 6: Set the time out (in seconds) for auto-redirection to the survey page in the Redirect to survey page after field. This is an optional feature that you might like to use to make the process automatic. The Default value is 0 (zero).
Step 7: Design the page using the editor. Use the macros and tools to enhance the quality of your design.
Step 8: Monitor your progress by clicking on Preview (bottom section) to confirm your action before saving.
Step 9: Click on the Update button below to save and apply the changes to that page before moving on to the next page.
Via Mobile App
Step 1: On the home page, click on the menu (3 horizontal lines) at the top left corner to expand the list.
Step 2: Click on the Backoffice menu to login to the Web Back Office.
Note: By doing this, you will be redirected to the Mobile Browser view of the system.
Step 3: Expand the menu at the top right corner and then click on Website Setup > Page Editor.
Step 4: In the Page Editor, click on the Presentation link under the SALES FUNNEL section.
Step 5: Enter the basic details (as explained in the previous tutorial), i.e. Title, Meta and Meta Keywords.
Step 6: Copy and paste the Video Embed Code in the space provided. Refer to the YouTube Example for help.
Step 7: Set the time out (in seconds) for enabling the Continue button in the Enable Continue Button after field.
Step 8: Set the time out (in seconds) for auto-redirection to the survey page in the Redirect to survey page after field. This is an optional feature that you might like to use to make the process automatic. The Default value is 0 (zero).
Step 9: Design the page by using the editor. Use the macros and tools to enhance the quality of your design.
Step 10: Monitor your progress by clicking on Preview (bottom section) to confirm your action before saving.
Step 11: Click on the Update button below to save/apply the changes to that page before moving on to the next page.
Until our Next Lesson!
Yours Truly,
HourADay.com Support and Training Crew
Skype: ins-support
PS: If you want to jump ahead and learn more, you can see the entire training series by clicking here: Tutorial.