Today’s lesson will take 3 minutes and 38 seconds to read and try. Using this feature can easily save you 10 minutes PER CONTACT once set up, then literally 10 minutes per week per contact!
Have you added a contact yet? There are various ways to add a contact and they differ whether you are on the Mobile App or logged into the web app.
Here are a few videos if you prefer to Watch vs Read:
- Add Contact from Card Scan in Mobile App
- Add Contact from Web App from your computer
- Add Contact by CSV Import
Mobile App – Add Contact by Card Scan
The easiest way to get contact data into HourADay is to use the Scan Card Function.
Step 1:
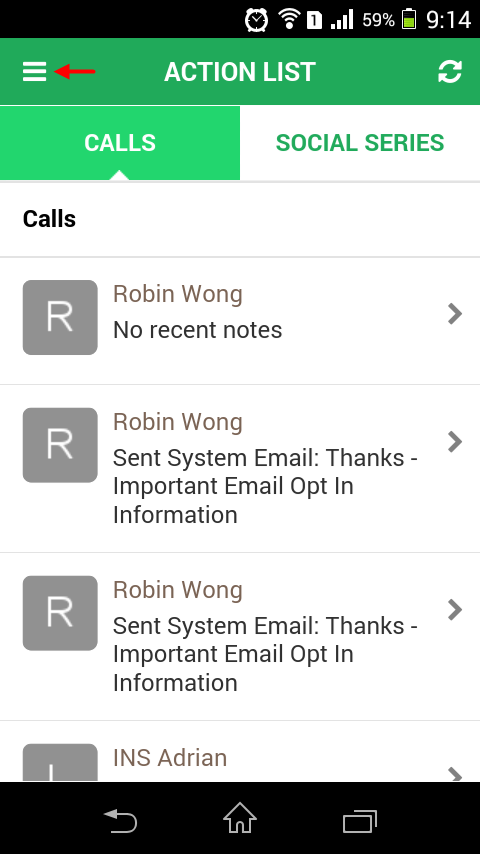
- Click on the 3-horizontal-lines icon at the top left of the Action List View to expand the menu.
- Action List is the default view you see when you login to the APP
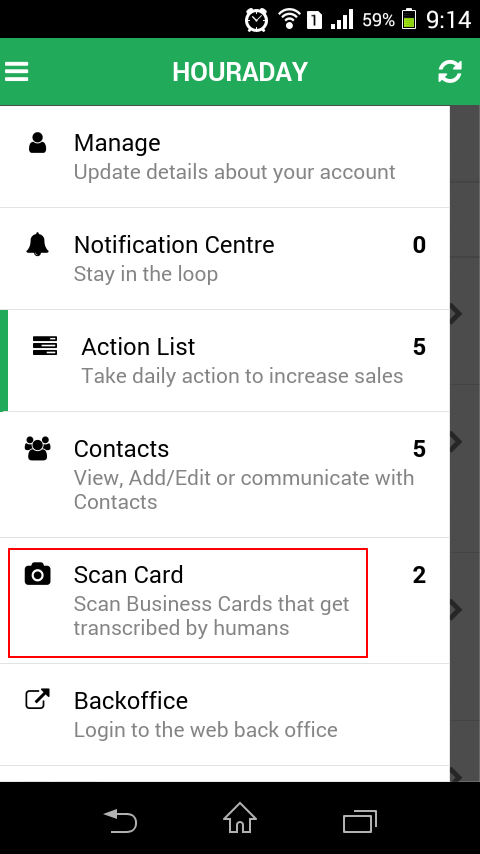
- Then click on the Scan Card option in that menu-list.
Alternatively,
- Click on the 3-horizontal-lines icon at the top left of the Action List View to expand the menu.
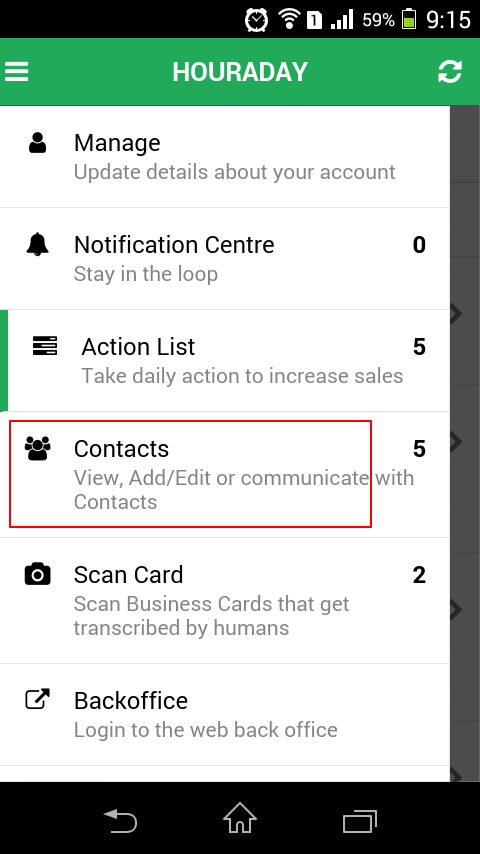
- Click on the Contacts option in that menu-list.
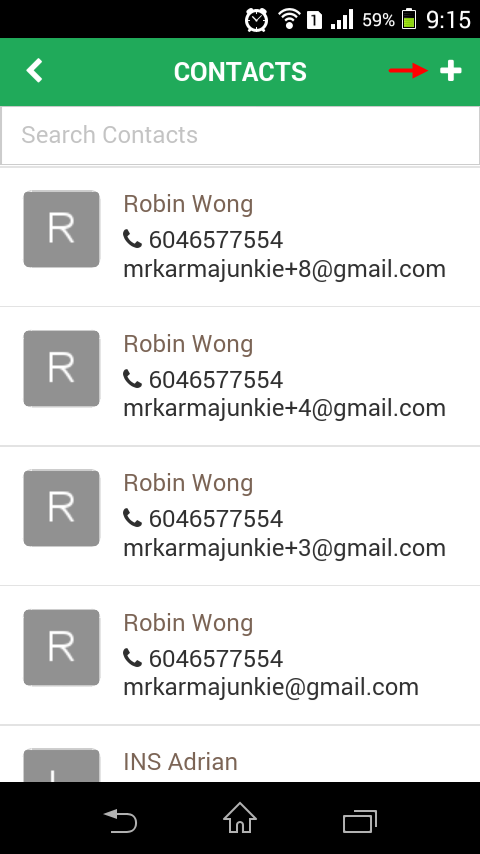
- Click on the + icon on the top right corner in the Contacts page.
- Then in the Add Contact page, click on the Card Scan option.
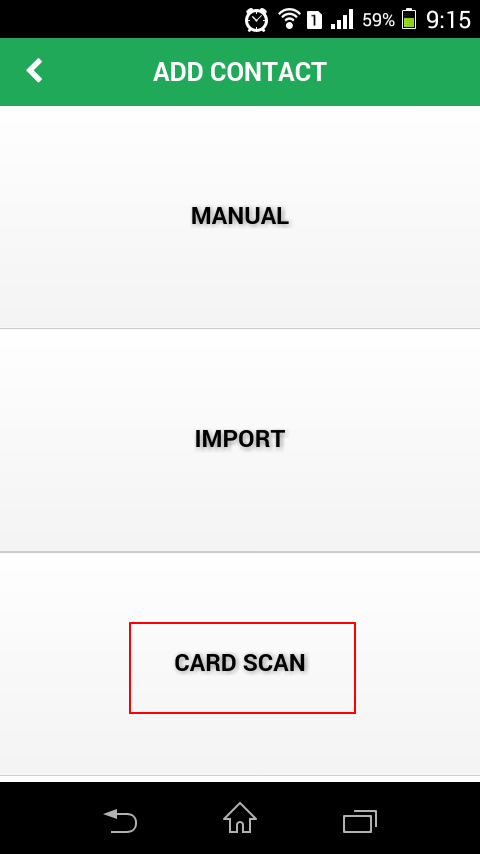
Step 2:
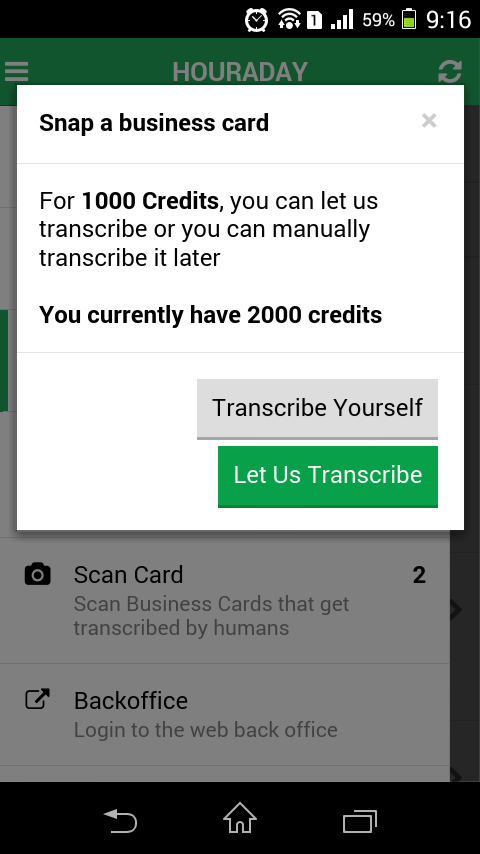
Now, you either transcribe it yourself for free or use our transcription service at .50/card (you get 8 for free in your free trial, then we top you up to 10/month with a 29.99/month subscription).
The system will show you how many scan credits you have (1 card is 1000 credits). Select the option you prefer.
- Transcribe Yourself: Option to add the card information in the system manually.
- Let us Transcribe: Option to use your transcription credits to let us do it for you.
Step 3:
Both buttons will open your camera to take a picture of the card. You will take the picture, click the Use Photo button or Retake if the picture is blurry. (Remember, we can’t transcribe what we can’t read)
Step 4:
Now you will be on the Survey page, where you can set these questions up to trigger all kinds of actions. Once done, save the data and choose what action to be followed upon saving.
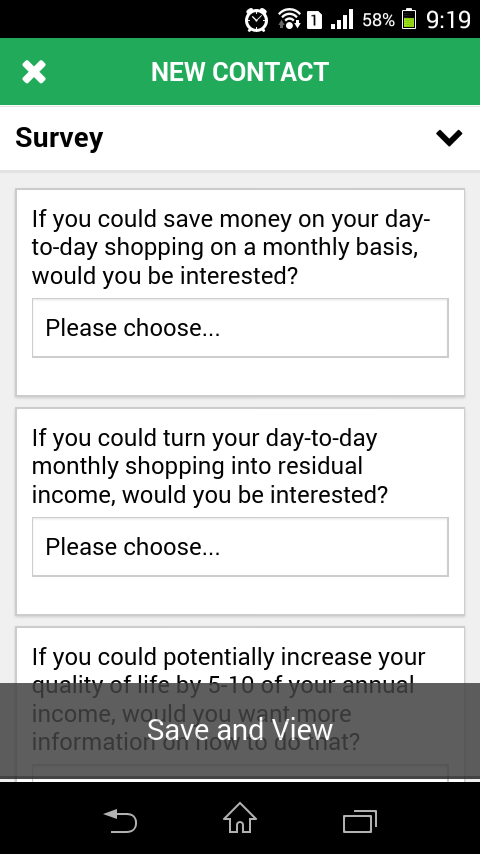
This is not so much for you to do an actual survey in front of the person you are talking to, but rather as you do your Networking, you learn the key info you need, then fill in the survey yourself after you have parted company with the prospect. The key here is you can trigger a timed email follow up from the answers in your survey.
Example Scenario on this below
- If you clicked Manual vs. Transcribe, once you click use photo, the image will be saved and you will see a Transcribe link in the contact record to click on to begin the transcription.
- If you clicked Transcribe vs. Manual, it goes off to our Live Transcribing team for your image to be turned into data and fed back into your contact. You will be notified on your phone when the data is back
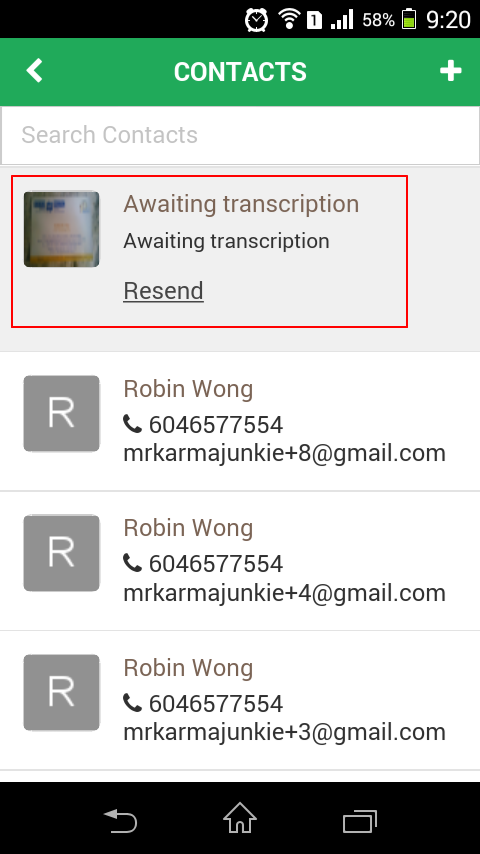
The second it is back, it will trigger your Initial email to be sent.
Mobile App – Add Contact Manual
The second option or the regular option is to enter the contact details manually.
Step 1:
- Click on the 3-horizontal-lines icon at the top left of the Action List View to expand the menu.
- Click on the Contacts option in that menu-list.
- Click on the + icon on the top right corner in the Contacts page.
- Then in the Add Contact page, click on the Manual option.
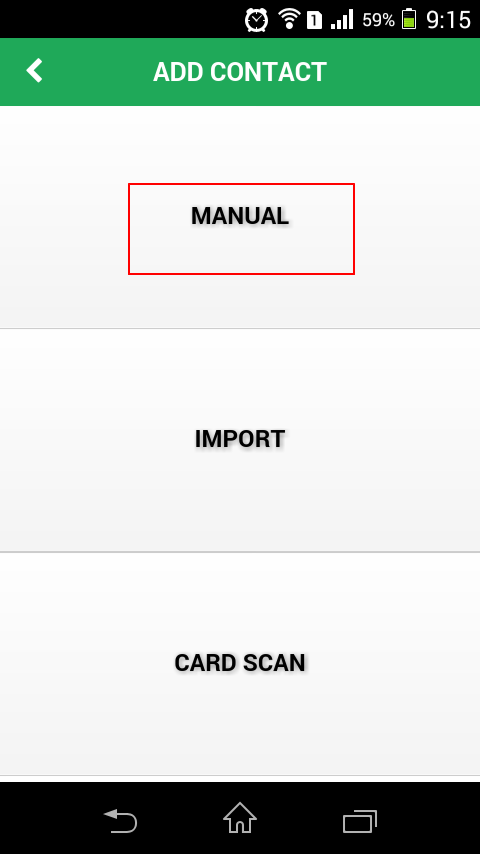
Step 2:
Fill in the Data Fields as desired. If you wish to also do a Survey, click the down arrow to access the survey. Then save the data and choose what action to be followed upon saving.
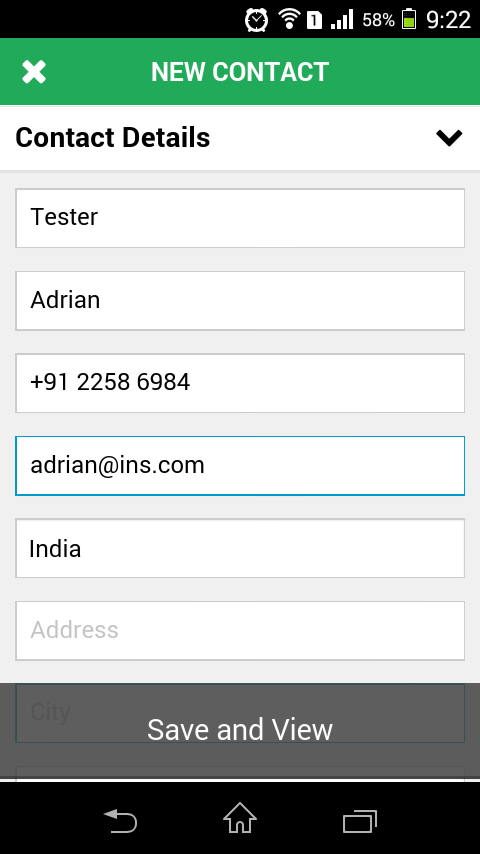
Note: The same actions are possible here as the Card Scan method of data entry when it comes to automatically adding them to an email series.
Mobile App – Add Contact Import
The third way of adding contact information is by using the Import Function of the system.
Step 1:
- Click on the 3-horizontal-lines icon at the top left of the Action List View to expand the menu.
- Click on the Contacts option in that menu-list.
- Click on the + icon on the top right corner in the Contacts page.
- Then in the Add Contact page, click on the Import option.
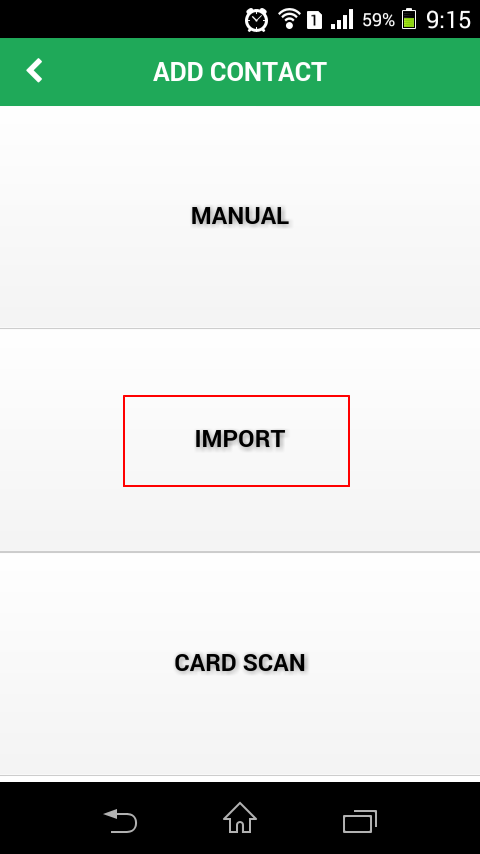
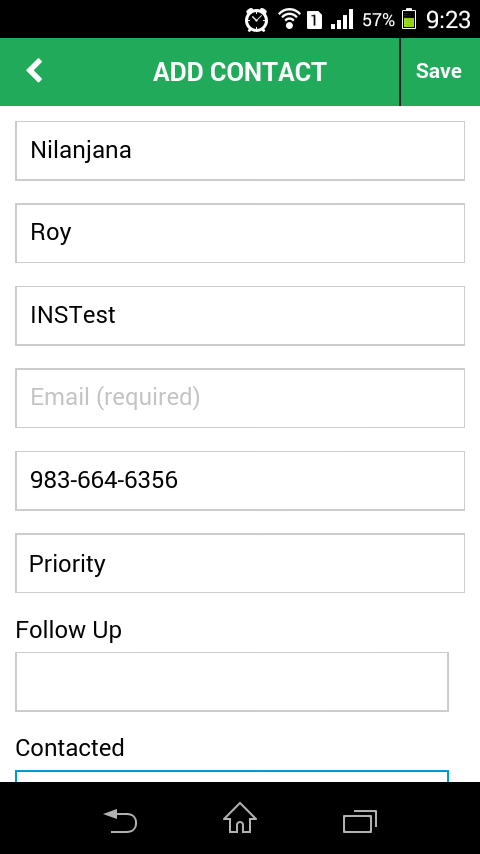
Step 2:
This will open the contacts in your phone book. Select the one you want to import and this will take you to the Edit Contact form. Edit any changes and then click on the Save link above.
Web Application – Add Contact
Login to the web application from your browser at www.houraday.com and click the Login Button at the top right. Your username is either your email address OR the username you set to refer the app to others. Use the password you set when you started your free trial.
Step 1:
Either Click the + (plus) icon at the top OR click Calls and Contacts from the left hand menu and then Add Contact – either way will get you to the add contact page.

Step 2:
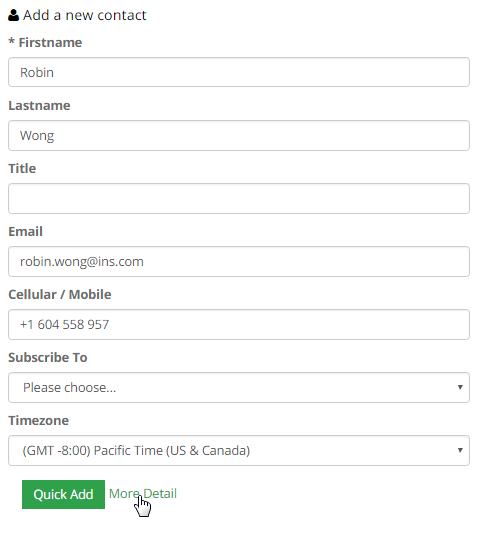
- You will be presented with the Quick Add basic contact details addition screen by default. You can see that you can add their Firstname, Lastname, email, mobile phone, and time zone. You will also see that you can subscribe them to whatever email series you wish as well.
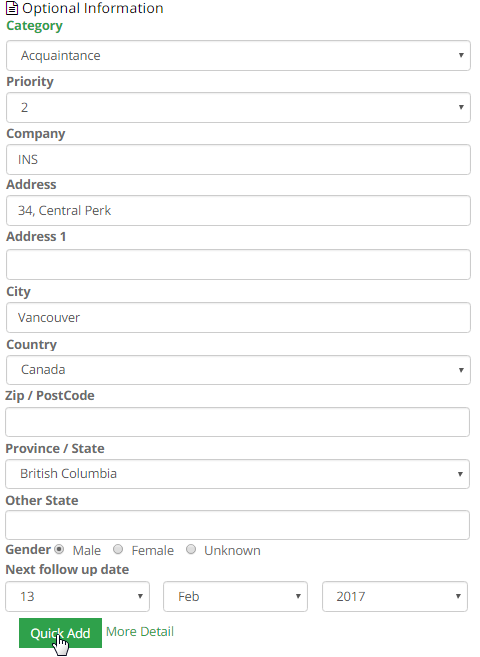
- Should you decide to look at ALL the fields you can submit vs. just the quick add, you can click the more detail link and now you will see a bunch of available data fields to enter. You can set the category priority, a company name, address, country, zip, state and even gender.
Adding contacts in this manner WILL trigger the Opt in Email to go first followed by your Initial Email once your prospect has opted in.
Click Here for a 1 min 6 Seconds video on how to do this.
Example of HourADay Survey Power
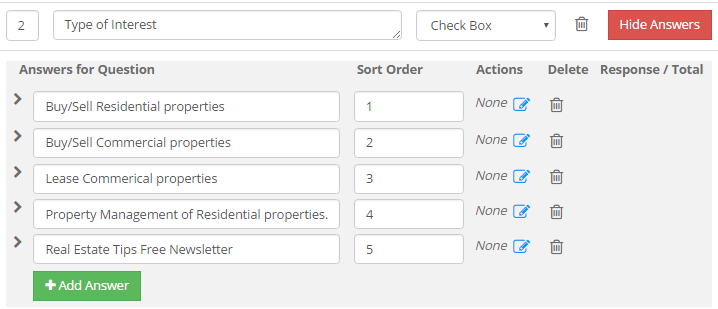
Lets say you are in Real Estate with 5 services.
- Buy/Sell Residential properties
- Buy/Sell Commercial properties
- Lease Commercial properties
- Property Management of Residential properties.
- Real Estate Tips Free Newsletter
These services would require very different and specific follow up information.
Believe it or not, this can be automated.
Step 1:
- Make a survey question “Type of Interest” and use “checkbox” as your answer type.
- Make your answers the 5 types of Services you target.
Step 2:
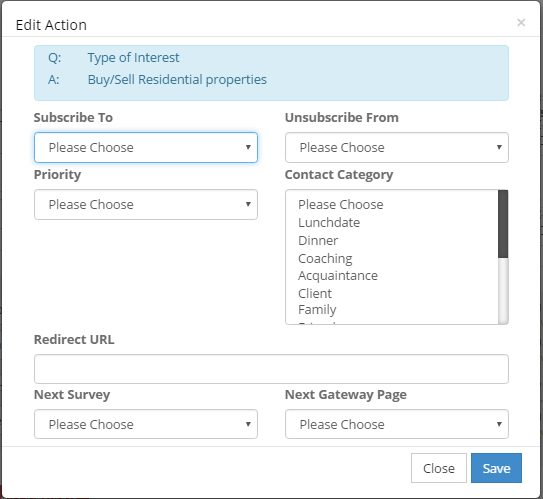
You can now set each answer you check after talking with the prospect to trigger a SEPARATE email follow up Series.
We know what you are thinking. You are going to FLOOD this prospect with information if they go into ALL of your series as they are interested in all of your services!
Step 3:
HourADay has you covered with our Email Series Start Delay Function. You can delay the start of any email series by a number of days from the time you added the contact.
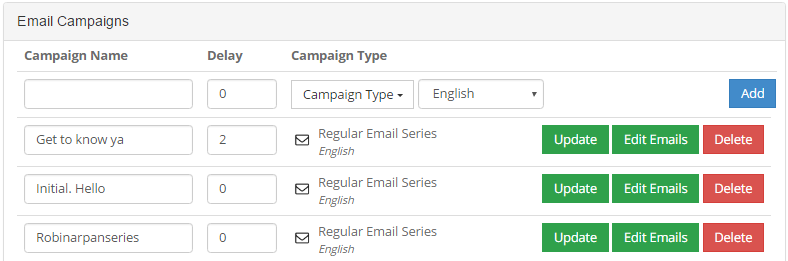
Your new prospect will get your Initial email as soon as it comes back from the Transcribers or you manually transcribe. Then any series you have as a NO delay set up will go on a daily schedule.
The smartest way to use this feature is to send them the simplest information first and likely with no delay, so in this example, the Real Estate Tips Free Newsletter could have the first one go without delay.
- Information on Buying/Sell Residential could go with a 1 day delay.
- Information on Lease Commercial could go with a 2 day delay.
- Info. on Buy/Sell Commercial could go with a 3 day delay making the person you are sending info. to think you are the hardest working Realtor on the planet diligently working on putting together the information they had requested from you. (when in fact you are just the smartest).
Make sure you start your emails creatively with things like, “You had also suggested you were interested in our Commercial Leasing division. It took me a few days, but I have managed to get this information put together for you. Sorry for the delay.”
The Key to good Sales Automation is for it to NOT SEEM Automated!
Watch the Entire Sales Funnel Detail video
Until our Next Lesson!
Happy Dreaming.
HourADay Support and Training Crew
Skype: ins-support
PS: If you want to jump ahead and learn more, you can see the entire training series by clicking here: Tutorial