In the previous email training about Configuring and setting up your Sales Funnel system, you have learned everything about How to Setup your Introduction, Presentation and Survey questions to complete your Funnel.
Now that we have shown you the mechanics of the system, in this TUTORIAL, let’s start by showing you examples of how Powerful the system is… This is what I would refer to as Your Complete Guide to how you need to think when configuring your system; it is about the how and why and less about the mechanics.
The Introduction
The purpose of this entire process is to Qualify the prospect though a series of survey questions to give YOU an idea of the priority you need to set with this person. If you determine that they are not the ideal client, you can easily put them aside for now as the lowest priority. More on that later.
This email will take you about 10 minutes and 15 seconds to read and take action on.
Here’s a brief description of what you will learn through this tutorial:
- As shown in previous training, you will create or edit a survey with a set of questions to be answered.
- Other than the questions for contact details, etc. you may create questions that will lead to other questions.
- Based on specific answers to those questions, you will now be able to follow up and ask them even more qualifying questions. You will simply create more short surveys based on those answers.
Note: The Rationale here is that if you ask 20 questions in a survey, there’s a very good chance that they will be overwhelmed and not fill in all of the relevant questions that you have asked. I will save the examples for later in this tutorial, but for now, just know that setting up a series of surveys that are connected through specific answers to relevant questions will lead YOU to learning much more about them and thereby qualifying your prospect.
Any particular answer can lead the prospect to a New Gateway page, the next Survey, an email series, or a change in priority. The choice is yours…
The Picture
Let’s say that you have a Real Estate Business and you would love to attract more clients in all areas of your business. You may have a question asking them “what type of real estate they are interested in”, and the choices could be residential or commercial. You could then create another survey that would start with a statement that says, “You said you were interested in residential properties, are you an investor?” And this could on and on until you have all the desired information about the prospect.
Can you now see the POWER in creating qualifying survey questions? Depending on their answers, you could lead them in any direction you want!
At the end of this effective process, your prospect will most likely, depending on how you have set this up, end up on a “Final Gateway page” that would say, “Thanks for getting us the information we need to assist you further; we will make sure to follow up with you on your points of interest.” So start thinking about what you would like to say to your prospect at the end of the squeeze survey process as well.
The Requirement
Ok, so now that you have learned the basics and the power of the entire Squeeze Survey system, here is an example to guide you through the entire process. I am going to use Coaching as my example, although as mentioned above with Real Estate, this survey system and sales funnel will work magically within any industry.
Pre-Requirements:
- Create two new surveys with the names such as Personal/Life Coaching and Business Coaching.
- Create a landing page with a thank you message. Let us name it as, Thanks for your time.
Notes: It’s nice to end the process with a thank you note indicating that you have received their answers.
Since we are dealing with the Power of Surveys, if you need a recap and/or to refresh your knowledge of the basics of setup, feel free to visit these two tutorials for your reference: Survey Question and Landing Page.
The Plan
Here are the mental steps that you want to lock down in your mind: In this case, visualize that you are a coach. As a Coach to show the process, I want to lay out my business plan steps to attract my ideal client. Ok, let’s start.
First, I will create a survey called Main Survey, In this survey, I want to ask for Name, Email Address and Phone Number. Then this would be followed by one simple question, “What type of Coaching are you interested in?”
The options i have given them are “Personal/Life Coaching” and “Business Coaching” – depending on the answer, they will be lead to another survey.
I will create two more surveys, one called “Personal Coaching” and the other called “Business Coaching”
For each new survey (in this case, 3 of them), I will add some content as a way to introduce the survey.
Depending on their answers to my survey questions, I will then choose one or more of the options, ie, subscribing them to an email series, adding them to an existing category, sending them to a new Gateway page, changing the priority, or (and for the purposes of this tutorial) sending them to the Next Survey.
By thinking about exactly what you want to say and accomplish, you can easily start creating your Business Plan. Here are the steps to support your learning experience.
The Implementation
Assuming that you have the requirements ready in your system. Let us start with setting up the SQUEEZE survey. We would be editing the Default (primary) survey which is linked to the Enter Details page in the Funnel.
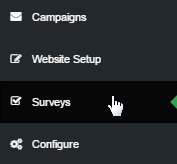
Step 1: Click on Surveys option on the left hand menu to go to the Survey Setup page (survey configuration).
Step 2: Open the drop-down menu on the top of the page to select the survey you want to edit. The system should the refresh the survey settings for you and auto-populate the corresponding options, upon selection.

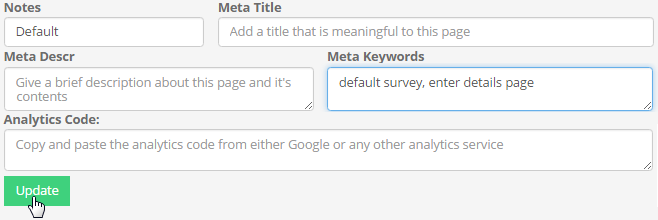
Step 3: Edit the basic details of the survey and then click on the Update button below to save the changes.
- Notes: This is the name of the survey that will be displayed in the drop-down menu at the top of the page.
- Meta Title: Here goes the title or the name of the survey page. Do not get confused with Notes vs. Title.
- Meta Descr: This is where you enter a short description about the survey and its content (for reference).
- Meta keywords: Provide proper keywords to tell the search engine what the topic/content of the page is.
- Analytics Code: This is where you paste the copied analytics code from Google or other service.
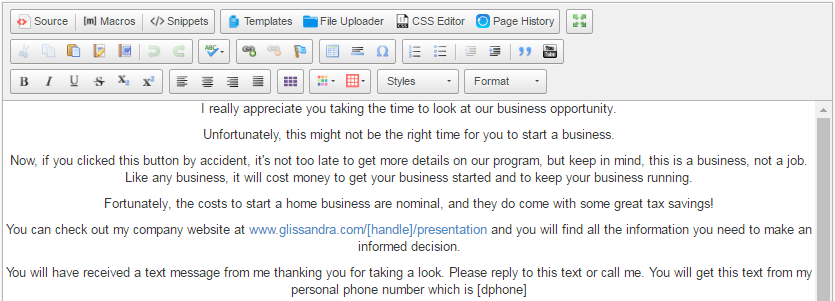
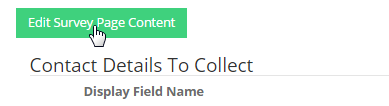
Step 4: If you like to add a note at the end of the survey, then click on the Edit Survey Page Content button. This is an optional feature, where you get to design the footer content and save it in the web-editor provided.
Note: Do Not get confused with the footer content vs. the top content of the survey page. For your Default survey the content to be displayed above the survey has been designed in the Enter Details page of the Funnel.
Step 5: Next comes the option you would like to keep to collect data regarding the prospect’s contact details.

Tip: It makes sense to ask for the contact details once (Default survey) vs. asking on the additional surveys too.
Step 6: Now we are going to prepare the question. For Coaching example, let us go with the followings;
Note: For our purposes to make things simple, one question and a couple of answers is the perfect scenario for you.

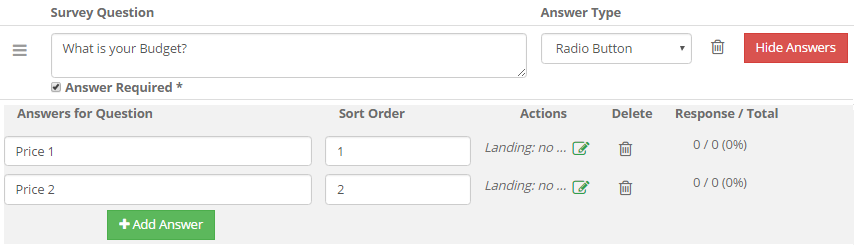
- In the Survey Question box type in the question as, “What type of Coaching are you interested in?”.
- In the Answer Type column, select the Dropdown List option as choice of collecting the answer.
- Check on the Answer Required box below the Survey Question to mark it as a mandatory to be answered.
Step 7: Click on the Show Answer button to expand the answer section. Then click on the Add Answer button and you will be provided with a new row where you can do the following (same for each answers);

- As the answer to the question, let us enter two options – Personal/Life Coaching and Business Coaching.
- Set the Sort Order for each. It is the value which derides the order of appearance of the answers in the list.
- Click on the Edit Action icon to open the panel to set the specific action to be triggered upon selecting the answer. Set the details of the action from the respective drop-down list and then click on the Save button.
- Select an email series from the Subscribe To drop-down menu. For example, Follow-up Series.
- Set the Priority of the contact as per your choice. The less the value, the higher is the priority.
- Select a Contact Category from the list, to which type you want to place the contact.
- Select the option in the Next Survey drop-list, i.e either Personal/Life Coaching or Business Coaching.
- Select the Thanks for your time option from the Next Landing Page drop-down menu and then save.


Notes: Get familiar and take your time in this area, as there’s a lot that you can do as mentioned above.
Step 8: Finally, you need to link the landing page to alternative surveys, i.e Personal/Life Coaching and Business Coaching. Select the respective survey and edit the actions for each answers, in the way similar to the above step. In this case, select the page option from the Next Landing Page drop-down menu and then save your action.
The Conclusion
Study the steps above, Learn the process, and enjoy Creating your Ultimate Squeeze Survey system.
When you are done setting things up, you will see your “Finished Squeeze Survey system:”
Click here to see what the entire process will look like based on our Coaching example: My Survey.
And feel free to fill in the answers to get a feel for this awesome process!
Once again, Start thinking about how you want to structure the plan and follow the detailed steps above to create whatever you wish for your business. Spice it up and have fun with the process. There are so many options, so use this example as your starting point, and keep referencing all the steps above to create your masterpiece.
Until our Next Lesson!
Yours Truly,
HourADay.com Support and Training Crew
Skype: ins-support
PS: If you want to jump ahead and learn more, you can see the entire training series by clicking here: Tutorial.